

Quick start guide:
Set up your year at a glance calendar in minutes
Learn how to connect your Google Calendar, customize your views, and get the most out of Glance in just a few minutes.
If you’ve ever wished you could zoom out and see your whole quarter or year instead of constantly flipping between weeks and months, you’ve come to the right place.
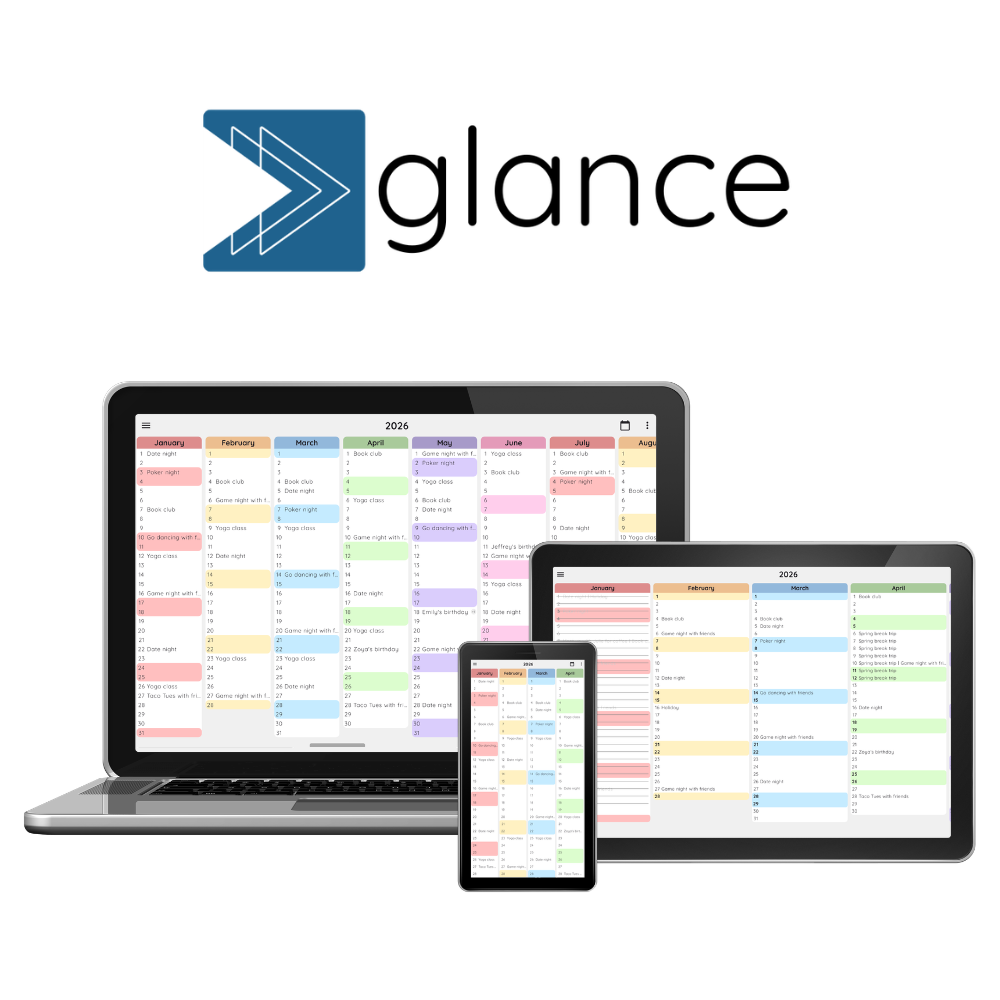
Glance syncs with Google Calendar (with more calendar integrations on the way) and gives you a flexible year-at-a-glance view of your schedule. You can zoom from a single day all the way out to a full year (or even further – the only limit is your screen size!), switch quickly between different views, and decide which events appear at each level.
After using Glance for a while, you start looking at your calendar a little differently. Instead of only thinking about what’s coming up next, you begin to notice patterns, plan further ahead, and make better use of the time you already have. It’s much easier to spot busy periods, find the best time for a holiday, or see at a glance whether you are on track to reach your goals.
This guide will help you get set up, tailor Glance to the way you plan, and share a few tips we’ve learned from using it ourselves.

Get started with your year at a glance calendar
Step 1: Connect your Google Calendar
Sign up for Glance and follow the prompts to connect your Google account. If you use multiple Google accounts, make sure you choose the one with the calendar you use most.
Google will ask you to grant Glance permission to view and edit your calendar. Make sure you tick all of the checkboxes. This allows Glance to display your events and keep everything in sync whenever you make changes.
A quick note about privacy: We know calendar data is personal. Glance only requests the permissions it needs to display and edit your own Google Calendar events. We don’t access anything outside your calendars, and we never share your calendar data with anyone else.
Once you’ve connected your calendar, you’ll be taken straight to your year view. Your existing events should already be there. If your calendar is still blank, it’s usually for one of two reasons:
- Your Google Calendar doesn’t have any events yet. No problem! You can start adding events in Glance, and they’ll automatically sync back to Google Calendar.
- The connection didn’t go through. Open the left sidebar and click “Connect new calendar” to try again.
If your year view is now full of meetings, reminders and recurring tasks, don’t worry. In the next step, we’ll show you how to decide which calendars belong in each view, so your year view stays focused on the things that matter most.
Step 2: Sync across your devices
You can use Glance wherever you are. Whether you prefer planning on a large desktop monitor or quickly checking your schedule on your phone, your events and settings stay in sync automatically.
- Desktop: Simply sign in at app.getglance.io
- Android: Download the Glance app from the Google Play Store.
- iPhone & iPad: Sign in through your web browser, which is fully mobile responsive. If you’d like an app-like experience, you can also add Glance to your home screen in just a few taps:
- Open Safari and sign in at app.getglance.io
- Tap “Share”
- Tap “Add to Home screen”
Step 3: Decide what belongs in your year view
A full year view calendar is most helpful when it helps you spot what’s important at a glance.
If you only track a few important events, you’re probably good to go. But if your calendar is full of meetings, reminders or time blocks that make it difficult to identify what’s really important in the year view, it’s worth customizing which calendars belong in your day vs. year view.
Open the menu (☰) at the top left to see your calendar list from Google Calendar, then choose which calendars should appear in the “Year” and “Day” views. For example:
- Events → Year & Day view: Birthdays, travel, concerts and appointments.
- Work → Day view only: Meetings, deadlines and shifts.
- Productivity → Day view only: Time blocks, habits and personal projects.
- Wellbeing → Day view only: Exercise, therapy and other recurring routines.
- Goals – Year & Day view: Milestones and target dates for bigger plans.
If all of your events currently live in one calendar category, consider splitting it into separate calendars within your Google Calendar account. This makes both Google Calendar and Glance much easier to use.
Step 4: Manage your events
You don’t need to switch back to Google Calendar every time you want to make a change. You can create, edit and delete events directly in Glance, and everything will automatically sync back to your Google Calendar.
To create a new event, select a day in the year view, click the + in the top right, then add a title, choose a calendar, set the date and time, and save. You can also create multi-day events, edit or delete existing ones. In the “Day” view, you can simply drag and drop events to change their time.
Why not try creating a test event? It’s a quick way to make sure everything is syncing properly.
That’s it! Your Glance calendar is all set 🎉
You’re now ready to view your time across months, quarters or even your entire year, without constantly flipping between traditional calendar views.
Here are a few extra tips to make Glance work even better for you:
- Prefer scrolling instead of swiping? Open the menu at the top right (⋮) and turn on “Vertical scroll” for an almost endless timeline into the past or future.
- Want colors based on event types? Open the menu at the top left (☰) > Click the gear icon > Click “Personalization” > turn on “Show event colors” and try out the different themes. Your event colors will match the ones you’ve already chosen in Google Calendar.
- Want to see more (or less) at once? Click the menu at the top right (⋮) and adjust the “Month width” slider. You can zoom smoothly between a full year, half-year, quarter, or anything in between.
- Need to look further ahead (or back)? Use the horizontal scroll bar at the bottom of the screen. Click the calendar icon at the top right to jump back to the current date anytime.
- Planning weekends or short trips? Open the menu at the top right (⋮) and enable “Align weekends” to line weekends up across the year, making it much easier to compare them at a glance.
We’d love to hear from you! Whether it’s a question, feedback, or just to say hi, fill out the form or send us a note at team@getglance.io.
For tips on planning smarter, sign up to our newsletter here.